Step 2: Create Access Proxy
Note
Access proxy is optional and it incurs additional cost. If you can connect to Amazon OpenSearch's VPC (such as through VPN connection), you don't need to activate access proxy. You need to use it only if you want to connect to Amazon OpenSearch dashboard from public Internet.
You can create a Nginx proxy and create an DNS record pointing to the proxy, so that you can access the Amazon OpenSearch Service dashboard securely from public network. For more information, refer to Access Proxy in the Domain Management chapter.
Create a Nginx proxy
- Sign in to the Centralized Logging with OpenSearch console.
- In the navigation pane, under Domains, choose OpenSearch domains.
- Select the domain from the table.
- Under General configuration, choose Enable at the Access Proxy label.
- On the Create access proxy page, under Public access proxy, select at least 2 subnets which contain
LogHubVpc/DefaultVPC/publicSubnetXfor the Public Subnets. - For Public Security Group, choose the Security Group which contains
ProxySecurityGroup. - Enter the Domain Name.
- Choose the associated Load Balancer SSL Certificate which applies to the domain name.
- Choose the Nginx Instance Key Name.
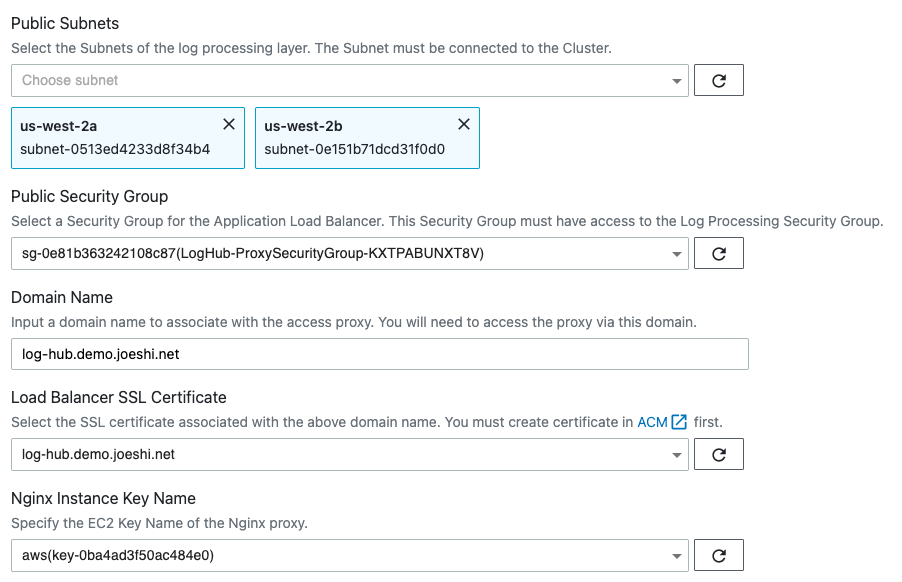
- Choose Create.
After provisioning the proxy infrastructure, you need to create an associated DNS record in your DNS resolver. The following introduces how to find the Application Load Balancing (ALB) domain, and then create a CNAME record pointing to this domain.
Create an DNS record
- Sign in to the Centralized Logging with OpenSearch console.
- In the navigation pane, under Domains, choose OpenSearch domains.
- Select the domain from the table.
- Choose the Access Proxy tab. Find Load Balancer Domain, which is the ALB domain.
- Go to the DNS resolver, and create a CNAME record pointing to this domain. If your domain is managed by Amazon Route 53, refer to Creating records by using the Amazon Route 53 console.